Showing posts with label Freebie Ornaments;. Show all posts

Thursday, November 19, 2009

The Good Shepherd and a Jeweled Butterfly

It's very rare that I get to see any of my designs stitched, but I had to make a hasty trip to Vikki's house yesterday (most excellent finisher here in Austin) to borrow back a Celtic Cross for which I had discarded the pattern, and to take a picture of this Alms basin pad (collection plate) I designed for Church of the Good Shepherd here in Austin about two years ago.

This is one my son and I chose for his family to donate as a memorial to the child of a good friend and church member.

These things really come to life when the stitching is completed! It's worked in Paternayan persian wool, of course, in basketweave, as durability is a factor. However, I chose Kreinik 002V metallic braid for the halo, as well as silk, to make it stand out against the "ecclesiastical red" background.

This piece has a very sad story that developed while I was designing the series - but I won't deal with that part of it today. It's a beautiful day outside, and time to move on.

While I was chatting with Vikki, I was also looking through the stacks of finishing on her table - she also does finishing for Amy Bunger, so there were some very interesting pieces to see.

Then I spotted one of mine from several years ago (now discontinued) - a "jeweled" butterfly that I had forgotten about. A lady who does exquisite stitching had apparently purchased it from a shop and worked it - and there it was!!! I came home and actually found the pattern, so have it offered on Freebies, Etc. for anyone to do.

Monday, August 10, 2009

Halloween Stuff in Needlepoint

If you haven't looked at Freebies, Etc. lately, go over and see my latest madness - napkin rings for a spooky table setting. My grandsons approve.

Thursday, July 16, 2009

The Purple Ornament Progresses!

This ornament has been very entertaining to stitch, as by doing it on bare white canvas, I can see color marching along like a child with a coloring book - my preference when working on my own designs.

Anyway, it's coming to life and taking shape. The arrow is pointing to where I filled in the gap between the leaves with T-stitch, which is a simple matter, but does require a bit of thought and attention. I don't usually like textured stitches on backgrounds, as they do get a little messy around design, but in this case, the stitch is so small scaled, it didn't interfere visually.

The second picture is a detail, showing (where the arrows point) the fact that the outlining of the flowers is accomplished by stitching across the tops, and then separately, across the bottoms - much easier and more efficient.

More flowers are outlined in the third image, and the arrows are showing the direction of the tent stitch outline. This is one place I "break the rule" and turn the canvas so as to make the tent stitches stay smoothly oriented instead of letting them "sawtooth" (which is typically the look of needlepoint). It simply makes a smoother, neater edge for finishing, and keeps the textured background stitches confined and not ragged looking. This is simply a matter of switching direction about halfway across the straight edges at the top, bottom, and sides. Very simple.

The arrow pointing to the bottom of the flower on the left shows the progression of stitching across the bottoms of the flowers for the outlines.


With the fourth color begun and more color on the flowers with the centers and leaves, it's really looking fine!!

This is what makes me keep going rather than abandoning the whole project! Now for filling in the flowers, where I'll use Petite Frosty Rays and Flair - the rest is in DMC cotton for the matte look I wanted, and the Satin Floss for the centers for some shine. More tomorrow (maybe, if I don't get sidetracked) There is still the red one with the PVV and beads! Also, I hear the Mindy With Beads project calling.


Wednesday, July 08, 2009

Choosing Colors, Thread, Textures - the Difference it Makes!

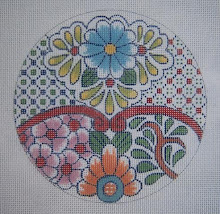
This ornament is one I presented on Freebies, Etc. a while back, and also is to be used in my e-book on "Laces and Trims." It's such a simple thing, and I thought it would be a good one to illustrate how a change of color and using different threads, etc. can entirely change the look of a piece.


I don't paint things I'm going to stitch myself, as I'm too lazy to take the time, and also, I love the way it develops on the blank white canvas - kind of like painting. The dots I added are for the later placement of beads, which will be the clear Sundance #250 hexagonal ones for the glitter they produce - will also use them on the white flowers.

I'm using Petite Very Velvet, and also the Kreinik 002V braid that's so pretty with it. As always on shaped ornaments, I outline the shape first so it will have a smooth edge for finishing.

This ornament is to be used either as a tree decoration, or as a kissing ball mounted over a styrofoam ball to hang for a party decoration, or maybe just to sit on a table and look sparkly and cheerful at holiday time. Actually, the ball could be two sided, as this project is quick to do, being only 4 1/2" diameter. Also, by drawing it yourself on canvas, it's quite inexpensive.

Incidentally, my first thought was to do it in white PVV with red flowers - other color combinations are certainly feasible.

The second picture is of one I painted to show what color choices can do. I haven't had time to even think about stitching it, but when I do, I'll draw it on blank canvas rather than using this painted one.


I'm using cotton floss here, probably in "T-Stitch," as I want no sparkle, and will use petite Frosty Rays for the flowers in either bump stitches or long, slanted ones. The leaves and centers will be stitched with DMC Satin Floss, as I like the idea of having the shine as opposed to the matte finish of the cotton floss - interesting effect. Also, using pearl cotton for the flowers would be great visually! Due to the "ropy" spin, it has a sheen of its own.

If you haven't visited my Freebies, Etc. blog, this ornament is under the label "ornaments" (of course) and you can print it out and draw it for yourself. Also, I posted some Halloween napkin rings today, along with four with "jewels" on them. These too, can have major character changes due to a change of threads and colors - Try it!!

Thursday, December 18, 2008

Gloomy Day Relief: 4-Way Bargello on Eggs!

The gloom/fog/cold wet stuff continues today in Austin, and I need something colorful to brighten my day. As much as I love the Pueblo pottery adaptations, enough is enough of the brown, black and white for a little while. Also, a new project - even a small one, is good for a break - and good for the soul if it is quick and colorful.

I saw recently that someone stated that 4-way bargello would only work on squares - Dorothy Kaestner failed to mention that in her book in 1972, so when I bought that one in 1974, I set right out to do the 4-way on circles and ovals for ornaments. Of course all I had to work with was DMC cotton floss, so the finished pieces had no sparkle or zing.

I decided last night to try this technique on eggs, as I need relief from the Christmas colors, and also the "season" for these things is coming soon. Besides, the colors are pretty - and I'm seeing eggs in needlepoint that look a bit like the old spun sugar eggs of my childhood.
I pulled out two different versions of a color scheme: the first one is based on the Caron Watercolours, and the second has more sparkle, with the Kreinik metallics and Frosty Rays. I intend to take "artistic license" (Cheat) and use the PVV in between the bands of bargello, and maybe add a few beads.

The next picture is back to the seasonal colors, and the circle is tiny - only 3 1/2" diameter, so I should be able to do it tonight and post it on Freebies, etc. as a finished piece (if I get the charts done).

More relief via colors is to get back to the project I've had to put down for a while - the Crazy for Birthdays hearts. This one is March, with it's aquamarines and spring colors in sight. Daffodils will be glorious on this in silk ribbon! August is nearly finished, January is coming along nicely, and April already has it's diamonds finished. This will all get finished, I'm sure - and spring will come and I can play outside again before it gets hot - at which point I'll be wishing for the cold, wet, gloom to come again for a little while. (at least the rain). Oh well.

Sunday, October 26, 2008

"Freebie" alert

I just posted a brief thing on Long-armed cross stitch as an attractive and easy small border, as a finishing element both visual and to make the canvas roll over easily - it also goes faster and looks better than just doing basketweave on a two-thread border. The link to "Freebies, Etc." is on the side bar.

Saturday, October 18, 2008

Bargello Alert - A New One on Freebies, Etc.

This is an easy one that looks rather difficult and impressive! (The kind I like best) Do go see it and try it yourself with stash threads - all kinds of color possibilities here as well as decorative motifs!

For the rest of the evening, I'll be attempting to plant narcissus on the December "Crazy for Birthdays" piece.

Thursday, September 25, 2008

Something new! A "Freebie" Ornament

I just posted a "Freebie" ornament on the new blog. I'm a bit (or a lot) clumsy at this, as I haven't done it in a long time. My thought is to do this once per week if I can get to it - I used to write a weekly, illustrated newspaper column, and wash, iron, shop, cook, and clean for six children - in addition to producing a major line of painted canvas. Now pore old Granny just doesn't do much to be useful. My magazine deadlines (Needlepoint Now) are two months apart, and I don't market painted canvas any more. Oh well. I play on the computer a lot.

Anyway, I really loved - and still do - sharing these things and encouraging people to do things for themselves, so will offer lots of patterns, techniques, and tutorials this way. My designs are simple, as I do not like a lot of counting. I think the most one has to count on this one is six - and that is only for the centers of the four corner petals. I simply will not work having to look back and forth from a chart to the canvas!!

Anyway - enjoy! If there is anything you would like to see, just let me know.