Sunday, October 31, 2010

Bead Sprinkles for the Cookie

At this point, these Shamrocks look rather flat and uninteresting and I wonder what I'm doing. I think the idea of doing cookies began when I was looking for "Shamrocks," and images of plates of cookies with icing decoration popped up on my screen.

There was one that was a kind of medium dark green, and completely covered with what looked like solid sugar sprinkles with an outline of a lighter green line of icing. The best way, I decided, would be to do it with beads in my little "beaded solid but really isn't" technique.

This came about totally by accident about five years ago when I was doing plaids, and one day was weary of stitching weft. I decided to try doing the weft bands in beads, and to my astonishment, it looked like solid beading. The warp stripes had already been stitched - where I stitch vertical bands of color in basketweave, but using only the warp stitches, and leaving the weft stitches bare for horizontals. (You can see this "warp only" basketweave effect on the shamrock in the first photo).

The gingham heart is the piece I was working on when I found this new technique that has served me well for a long time and for many projects.

Another project in which I used this was the bracelet and earring phase. I have shown these before a long time ago, but dug them out to make a point.


I think I'm going on and on about what amounts to a designer's evolution of discovering methods and technique and useful "special effects" accidentally. Happy accidents!!

Back to the cookie! The next thing to consider was the kind of beads needed to do the "sprinkles." The first time I "saw" sprinkles was when I was designing four-way-bargello eggs a while back - a year or two back, and had embellished with beads. They suddenly looked like sugar sprinkles!

For this Shamrock, I knew that colored beads wouldn't look quite right, so resorted to my very favorite effect - the clear beads (Sundance #250 size 14) applied with the same color DMC floss as the background.

I used the plain ones rather than the hexagonal, as I wanted shine but not sparkle. There is a definite difference. The sparkle of the hex beads is more like ice.


The detail of the March Birthday CQ shows the plain clear beads attached with yellow floss and looking like water drops. "Ice" was on December. The bit of aquamarine jewelry you can see was made with aqua beads worked with basketweave as usual - it even works in very small spaces!

Now - back to the Shamrock, and the amazing change with just adding the beads! There is a strange looking diagonal effect which is due to the angle and the light I used - haste is the enemy of perfection. It doesn't look this way in real life, but just appears to be a solid coating of clear sugar sprinkles with green showing through. Amazing!!


In the detail, you can see clearly the effect of the diagonal tent stitch (basketweave) worked on every other row- which means it lands only on the warp stitches (the "bumps.")
Then the beads are inserted on the weft stitches, which are little dips. This way, the beads don't clump and wobble and look crowded and messy.

Also, in the case of using clear beads with colored floss on a painted canvas, by doing the warp stitches in color instead of beads, you get stronger color for the whole piece, whereas it would be too light and frosty looking (washed out) if no colored stitches were showing.

That's all for this evening. It's now time to go steal candy out of the basket by the front door in between rings of the doorbell. Little spooks and goblins are beginning to arrive!!

Friday, October 29, 2010

Moving Along with Shamrocks

Designers of painted needlepoint canvas have the year all turned around, as we have to plan ahead - waaaay ahead of the actual season. I think in the case of the Shamrocks, some of us are just tired of seeing pumpkins and witches over and over and over.

I don't do Halloween anyway except for a spot of candy corn now and then. I have no idea why I decided cookies would be a good idea - but here it is.

While I was working on two of these today, and my mind going faster and faster, I thought about the cookie cutter shapes I started using years ago to make ornaments instead of wasting time and materials as I worked out new techniques and stitches, and tried out new threads.

I had actual cookie cutters to trace around, and finally put them all into a booklet, which has now become an E-Book. I'm offering it at half price (on the side bar) as long as I'm on this shamrock cookie binge, as I thought some of you might enjoy trying these out for yourselves. It has a few additional shapes, like a mini-stocking, included also. ( I also have my "Paint Your Own Canvas" at half price on the Freebies Etc. blog this week.)

Anyway - back to the subject: The first photo shows getting started, and shows the beginning of the cookie dough border - the proper method of basketweave to keep it neat. The arrow points to where I stopped in order to continue the weft stitches in a straight line - and at the top as well.
This is shown as tutorials on both blogs with more detail.

The second picture shows the weft row completed, short one stitch. These two are actually moving along rapidly. Remember that green is a soothing and therapeutic color!!

I used diagonal cashmere on the first one, as I'm going to "decorate" it with icing.

It doesn't really have to look like icing, as it's just a cookie replica in needlepoint, after all, and I would rather have the time to play with embellishments - as I would a pastry tube if doing it in the kitchen for real.

Notice that I have outlined the icing shape first, as always, to confine the textured stitch, and to prevent ragged, unattractive edges.

The second one is really prettier than it looks here, as the light was bad at this time. I used a gorgeous "Holly" green Vineyard silk in Nobuko stitch, and the Petite Very Velvet dough is a cooler tan than I used on the light, yellowish green of the first one.

This is a small, kind of mindless piece, that is a relief from anything big and complicated, and I will enjoy playing with several, I think, to experiment with different effects. I put a pattern on Freebies that you can print out and trace onto canvas if you wish to try a few yourself.

Tuesday, October 26, 2010

What Color is Green??

This is a question I used to ask my students back when I was teaching hobbyists to paint and to mix colors. "Green is green" was the usual answer until I sent them outside to look - then it was difficult to get them to do anything but mix green paint.


Fascinating! A bit of color theory was thrown in , of course, to help them understand the "why" of what they were doing in the mixtures. It's really great to have control when mixing paint!

Anyway, I was inspired and motivated by my friend (internet type co-conspirator/fellow designer/collaborator up on Cape Cod) to do something regarding shamrocks, as that's what she is doing right now.

My only thought was a cookie. I mean ONE cookie. Then I decided to research "shamrock cookies" and couldn't believe the images I found - which may lead to a whole basketful of them. I had thought in the beginning with just one to make pale green icing with some dark green and crystal beads on top for "sprinkles."

However, now this idea has grown and grown to include a lot of different threads and "colors" of green and other wonderful things. It seemed only right to use Petite Very Velvet for the cookie dough, and then different textures for the icing itself. This is only a fraction of what I have buried in the drawers of my stash.

The Memory Thread will also make great icing as it would be if extruded from a pastry tube!! This will be lots of fun, and remembering that it's just a needlepoint replication, it doesn't have to be EXACTLY like a cookie, but can be used to practice many new stitches and techniques for decoration. as long as it "reads" as icing.


The first photo is as far as I went today, and is the first sketch that's done for a new piece - getting the size right, etc. The arrow points to a place that isn't quite correct and will need to be redrawn - tomorrow! I do hope to start stitching one soon.


When I get the drawing to suit me, I will probably put it up on Freebies, etc. so you can print it out and play along.

Sunday, October 24, 2010

Seasonal Napkin Rings

Looking back on this blog, I haven't really shown much on the napkin rings I did last year and the year before. However, you can see them on the other blog, Freebies, etc., by clicking on the label "napkin rings" on that site.

This picture is one I took last year of some I had designed, and Pat Miller of Needleartnut had stitched for me and finished, as well.

My grandchildren were enchanted with them - and found that paper towels work as well as damask. Anyway, after pulling out the swag of pearls to aid me in recovery from serious PPD (this is shown in the previous post on this blog), my mind started whirling again about more napkin rings. (or bracelets for those who wish).

The projects are small and simple, and one can really enjoy a bit of overkill and "goop" with threads, etc. You can see the entire range of Halloween as well as the "jeweled" series and lots of other rather seasonal things, and they can be printed out for you to use.

My latest idea for myself is to try out new threads and stitches - and also create wonderful embellished effects with the TAST stitches presented on PINTANGLE each Tuesday (as well as others on her Band Sampler) It's never wasted effort, as festive napkin rings are always fun for setting a table.

Saturday, October 23, 2010

Choosing Threads for a Small Project (quick cure for PPD)

When I finished the big Celadon canvas, I was really tired of it, even though it wasn't a boring piece. I always have a letdown (Post Project Depression) after finishing any big endeavor - either stitching or painting, and need something fast to divert and entertain me.

I was digging around in a drawer of things I had painted a while back for the blogs, and found the "jeweled" napin rings (which can also be bracelets if elongated). For some reason, I had always been fond of this one - with "pearls." This is one of those things I wonder about now - what was the inspiration, and what was going on in my mind? I'm not nearly this clever this week.

Anyway, although the paint is a bit brighter than the Petite Very Velvet I chose, I like the soft, velvety background. If I had used anything else, basketweave would have shown as texture, whereas stitches with PVV hardly show at all.. Besides, the gleam of the Kreinik 002V braid is gorgeous against it!
Normally, the little picot edge would have beads inserted for a little extra sparkle and shine, but in this case, I didn't want that, as it wouldn't look right with the surface of the pearls. it would just have been a lot of white dots to fight with the "string of pearls." The pearls are just a "bump" stitch over 3 x 3 stitches with Renaissance Shimmer.

The edge is done, as usual, with long-armed cross stitch, and with the 002V Kreinik, it is rather Baroque looking - a great effect! I like using this stitch on bracelets, belts, and napkin rings, as it folds over nicely and makes the finishing neater.
The left end of the napkin ring, not quite finished, shows where I decided to extend it one thread, as the pearl meets the one on the other end, and in finishing, they would run together with no separation.
It's such a mathematical process putting these on canvas - very simple, really - that it didn't occur to me to separate them. Probably nobody sitting at a table and using it would notice, but I would.
Since long-armed cross stitch works from left to right, I turned the canvas upside down so I could see what it would look like sooner. I believe these are on my Freebies, etc. blog where you could download the pattern - also check the label on this blog for it - it's been a while, and I don't remember where I put it.

Tuesday, October 19, 2010

Images and Inspiration (eye candy)


It is a fact that images implant in our minds and can strongly influence us in this work of designing and stitching painted canvas. It's a kind of subliminal suggestion that sometimes we aren't aware of - and this includes choosing color schemes and threads.

This is one of the reasons I cruise among blogs in the morning that are beautifully presented and have nothing to do with needlepoint.


The images will stay with me, although I'm unaware of it later. I was looking through the new Metropolitan Museum of Art catalog yesterday, and realized what a strong influence the jewelry has been on some of my small pieces - such as napkin rings and birthday crazy quilts.


Sometimes I pick up a piece I designed a few years ago, and wonder why I was so clever that day - and what was I thinking?? I probably couldn't do it again.

Anyway, I have found yet another blog with the little "painting a day" theme - just small, 6" x 6" paintings that are enchanting to look at, and have the five elements of design (line, shape, texture, mass, and color) in good order.

These paintings are the work of artist Lisa Daria, and the blog, as she presents them, is delightful! This is the sort of thing that, although I'm unaware of it at the time, will creep into my mind when I'm choosing threads and colors for a project. These pictures show a wonderful use of main color, secondary color, and accents! (with other touches too).

Have you ever thought about how decorating magazines subtly influence us in setting new trends for color and furniture? I know that sometimes at first I don't like it at all, but bit by bit it gets familiar and feels good. The same happens in the fashion world!

Next is the blog of Lin Moon at PURPLE FAN.In the post showing today, she is presenting some quilts from the Long Beach quilt show of the summer.

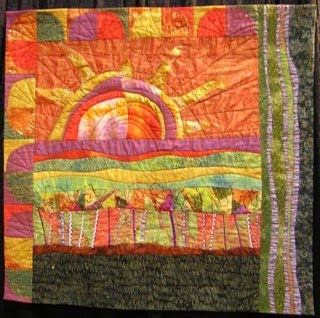
This first one is by Pam Berry - and I love not only the colors, but the texture and composition.

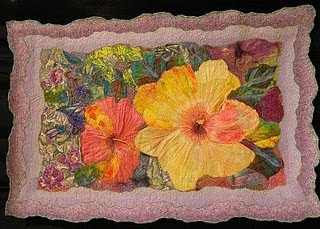
Next is a quilt featuring hibiscus, and if you click to enlarge it when you go to her blog, you will see some exquisite stitching on the flower - it gave me some ideas for needlepoint flower treatment!


Lin Moon also designs and stitches highly embellished and very imaginative crazy quilt art bras for the annual calendar that is sold for raising funds for breast cancer research - and she participates in the TAST activity presented by PINTANGLE. I really enjoy seeing what she does with the weekly stitches - a very talented lady, and worth a daily visit!


Sunday, October 17, 2010

The Celadon is Finished!

I have shown this canvas a number of times in the past few years, I think, and also the bowl (Chinese Celadon, ca. 1820) from which I took the design. The bowl was a gift from my son a long time ago, and he asked me to design a needlepoint piece for him for his office. Since this time, he has gone into private practice and started his own law firm, and moved his office three times. Oh dear.

I hang my head in shame, as the date on the canvas is 1996. I decided about a month ago not to touch any other stitching until I finished this one - and I did enjoy doing it. It is entirely basketweave, with outlining, of course, as no textured stitches would do on a design like this.

It was never boring, as there were plenty of color changes to move on to when I got tired of one activity - could just go to something else. If I tired of outlining, I could then work on the background.

It was very very rewarding to realize I had finished one of my large, classic pieces (15" diameter on 18 mesh canvas), that will still be beautiful and "in style" many years from now. Nothing trendy here, just timeless elegance, as are the Oriental porcelains. It is actually, the ONLY one of my classic big pieces I ever finished. I've had hopes of doing "Nellie's Imari," but that won't happen.

When I was wholesaling nationally, I really got tired of looking at them, so never had any desire to stitch one. I remember when Marnie Ritter (Fessenden in the '70's) was teaching via EGA on one of my smaller Celadon pieces - beautiful job of enhancement before that was being done! - she graciously reserved me a canvas and kit when she was in San Antonio at the Yarn Barn. I loved sitting in on the class that week, but declined the stitching, as I told her I had painted and inspected so many of them (close to 300, as I remember,) that I couldn't bear to stitch one too. Now I regret that I didn't.

I used DMC floss on this canvas, as I started it before I had seen the silks now available, but the cotton did a beautiful job. Also, I had the advantage of the gorgeous Kreinik 002V braid for the "coins." Back in the 70's, when I was producing so many of the Imari, Celadon, etc., we had nothing but Persian wool and no metallics. YUK.

This photo was taken in haste, and with not so good light - but I wanted to send Joe the pic to assure him this is really really finished. It will need light blocking - and then off to a wonderful framer for a double mat and non-glare glass. I'm sure it will have a place of honor in his office!

Friday, October 08, 2010

Halloween: My Contribution

I don't usually design anything for Halloween, except the little napkin rings (or bracelets) I did last year - I really enjoyed doing those, and the patterns are all on the Freebies page (my other blog), in case you missed it.

Also, on this blog, look under "napkin rings" on the labels list to see some of them finished.

This pumpkin has been shown before, and I intended it to be a little pillow inset, but now have lost the black Petite Frosty Rays I was using on the background - buried somewhere in the "sparkly threads" stash drawer, probably. It's set up as a 4-way bargello thing.

The pumpkin itself is petite Very Velvet, and the black background around it is YLI Black Shimmer Blend Ribbon Floss in basketweave. The little white dots you see are sparkles, not dandruff of canvas showing through. The face lit up by a candle is worked with DMC floss and Kreinik blending filament.

While we take for granted what the holidays and celebrations are about, I think we really know little of some of the symbolism and customs involved - and I have found it fascinating to research and study some of these. Also, it makes needlepoint renditions more meaningful and fun.

The carved pumpkin with a candle inside had its origin in the custom of medieval holy days in the practice of commemorating the souls in purgatory with candle lanterns carved from turnips. In the Celtic Halloween festivals, large turnips with carved faces and candles were placed in windows to ward off evil spirits.

In North America, pumpkins are more readily available, and much larger than turnips. However, this practice was originally associated with harvest time, and the American tradition preceded the Irish immigration during the great famine. The carved pumpkin was not associated with Halloween until the mid-to-late 19th century. I couldn't resist showing this picture from Nenah's Halloween Collection, as she is adding to it often, apparently. Do go see it HERE.

As for the origin of Halloween, I have known since childhood that it was the evening before All Saint's Day, which is the celebration of all souls, at which time we always went to church. I never really thought about why we celebrated the way we did all dressed up like ghoulies and ghosties, soliciting from door to door good things to eat. (treats) - it was lots of fun!

This custom originated in the medieval practice of poor folk going from door to door on Hallowmas (Nov. 1), receiving food in return for prayers for the dead on All Saints Day. The custom of wearing costumes and masks originated in Ireland as a Celtic tradition of attempting to copy and placate the evil sprits. The term Halloween is from the "All Hallow's Eve" - the night before.


The Mexican Day of the Dead and Halloween have some things in common, and occur in the same time period. They both are from cultural beliefs about death that later blended with Christian beliefs. They are both based on a belief that spirits return at that time of year.

However, in the Christian practice, the sprits were believed to be malevolent, and children were dressed to scare them away.


In Day of the Deal celebrations, the spirits are joyfully welcomed as family members that haven't been seen for a year. I remember, living in Texas, seeing down in the country cemetaries the children's graves covered with toys.


When we were living in Mexico City when my children were very young, it was a time that we allowed our domestics the several days off to celebrate, as it was a joyous occassion, and much feasting and visiting went on while awaiting the spirits of their loved ones. This was an example of the mestizo/campesino melding of ancient spiritual beliefs with Christianity. We had no trick or treating or Halloween celebration, but fortunately, my children were too young to remember doing that before we went to Mexico (a glorious experience).


I think now, having an insight into the meaning of these things, I will enjoy maybe stitching a few little Halloween pillow insets for myself.

Wednesday, October 06, 2010

A Fabulous Stitch Dictionary!!

A wonderful thing today on PINTANGLE!! Sharon B. has put in PDF form a great stitch dictionary, as a result of her TAST (Take A Stitch Tuesday) exercises this year - and other things. She has an extensive dictionary of embroidery stitches that includes many variations of each - but this downloadable dictionary, as well as her TAST challenge also show many ways to use the stitches to create patterns of their own.


I have enjoyed for several years using embroidery stitches on TOP of my stitched needlepoint to further enhance it and create special effects, and have found a lot of inspiration and ideas on this site, as Sharon goes way beyond just showing in fine detail not only how to make the stitches, but how to combine and to use the variations to create special effects.


The second photo is showing the format of the new dictionary/journal. This thing is incredible, and I've already printed out the first installment, each of which is three stitches.
In my enthusiasm for this project, I am wanting to show too much of it, but will confine myself to a few comments.


The first stitch shown by itself (my own choice from Sharon B's dictionary) is "zig-zag chain stitch," and it looks like something that could be used as an edging on a sleeve or neckline or something of that sort to resemble a "trim." I have planned a series of little "ethnic" stylel dolls, and will use a lot of these things for added effect in surface embroidery.
Next is a "swatch" of simple herringbone, but applied like this, it looks like netting!

I used many of these stitches on my little coral reef series - for coral and seaweed both. Different effects with different threads, from DMC Memory Thread to Threadgatherer "sea grass." I also enjoy preparing ahead of time some ornament shapes already background stitched, usually with needle blending - so can practice creating effects with different threads and stitch combos.


But enough of this - go to PINTANGLE and check it out for yourself, and print out the first installment. It's a freebie, offered by Sharon's great generosity - and we thank her profusely!!

Saturday, October 02, 2010

Evolutions in Stitching: Choosing a Painted Canvas

I'm still thinking about "beginners" in stitching on the painted canvas, and only recently am understanding why it's scary. People have been made to feel that they have to cover every tiny little space with decorative stitches - which isn't true, and usually only creates a lot of unsightly "goop."

There has been an evolution of my own thinking and stitching since the beginning of my designing and marketing the painted canvas so long ago (1969).

In the beginning, the challenge for a designer was to provide a beautifully drawn and painted canvas that was easy to stitch - and for the stitcher, it was to manage to work a lovely, smooth surface with no bumps or unseemly ridges.

Different people enjoyed different activities, so chose their canvases accordingly. Also, we tried to create a good balance between pattern and background, so one could switch back and forth to make it more relaxing and interesting.

I remember that my sister detested areas of basketweave background and enjoyed the tedious outlining. I didn't like outlining (still don't) so we switched and helped each other.

I'm showing this dodo bird again (still don't have a picture of the finished pillow with the tail feathers) that I did at my son's request about 14 years ago - adapted from a card from the Museum of Natural History). I did not enjoy that huge expanse of basketweave background, but would never have used texture there, as it would compete with the elements of the pattern. My challenge in painting and then stitching this one was the small things - like the shadows under it's feet, and the wing feathers. Also the gorgeous tail feathers!!

Anyway, after all of those years of stitching, I still feel that I'm a bit of a newcomer to stitching and enhancing the painted canvas as it's done these days. I think the beautiful and fun novelty threads have helped this along, as we didn't have them in the 70's and ;80's.

When I came back to needlepoint after a break of about 15 years, this was going on, so I decided I needed to experiment and learn some decorative stitches - which was fun.

I bought two or three books, and set out to explore to see what stitches actually looked like, and what effect different kinds of threads had..

However, my canvas style is just not for these stitches, so I started doing the crazy quilt format so as not to waste time, effort, and material - and also it was a lot of fun learning the embellishment of embroidery on top.

I have now decided that I am a beginner at actually doing this on a painted canvas, and need to start. Since I already have a formidable collection of favorite stitches, all I lack is a suitable canvas.

I could find absolutely nothing for starting out, as the ones I looked at were too busy already to accomodate much more texture, and I'm weary of looking at the same old same old stuff that is beginning to all look just alike - so I went cruising the internet and ebay.

To my astonishment, there are some really really fine painted canvas designers there that we never see just shopping at the LNS.

This first one is from Blue Dogwood Designs, (not on ebay) and I discovered it from an ad in Needlepoint Now. The designer has done beginner pieces, among many others, and taught classes at Needlepointer in Everett, Wa.

I love this tree, and the layered tissue paper effect it has - where the colors change at the overlaps. It's very simple, but I see a lot of possibility in the thread choices and stitches! I'll probably have to order this one and stitch it!

The next one is from her "travel" section on the web page - do go take a look! Beautifully drawn and painted, and they move me to want to try my hand at some decorative stitches to enhance.

The next one I found on ebay, and am enchanted with her work, as it's quite different from the "norm" and perfectly charming. They are from Needlepoint Art by Cheryl, and are also stitch painted and lovely. I'm not inspired so much to use decorative stitches as to enhance with different kinds of threads!!


The first picture is a "Dala Horse" - which I had never heard of, so had to go on a "Google" hunt. It's a Swedish thing - a national treasure of hand carved, painted horses, and I strongly encourage you to learn the history and otherwise investigate. I love leaning new things, myself.


The cottage is so appealing that I have already looked into my stash to see what I would use to make it sparkle! These are not really for decorative, textured stitches, but a joy for the colors and the different fun threads one could use.
The little bird is one of several, and is another "must have" for me, I think. It's hard not to show more, but this is enough, and you can click on the links to go browse!

Last is an amazing artist/designer I found on ebay - Nenah, who has a web page, Nenah's Needle. This lady is an animal lover with a great, whimsical side in her canvases - utterly delightful and well done work. I kept going back to look, which means I would most likely really enjoy stitching her things.

!You can see the versatility, as well as the whimsy.


That's enough for now - I'm tired. Hopefully, after this next move I have to make, I can purchase some of these for myself and blog stitch one. I did get permission from each of these ladies to show their work, as per good blog etiquette.

ADDENDUM: Nenah is an animal lover, (obviously) and contributes a percentage of her sales to a wonderful shelter. Also, her Halloween things are superb - full of imagination and personality (not necessarily for beginners).