Sunday, May 16, 2010

Kreinik Holographic and DMC Memory Thread: a Great Combo for an Ornament!!

When trying out - or using any thread at any time - there should be a definite reason for it, beyond just being the right color or because it's lying on the table.

The new Holographic thread by Kreinik has an amazing quality, and it took me a while to find just the right project for experimenting. (now the ideas are flooding into my head). It actually appears to have "lights" within it, so must be used to show off this characteristic for the advantage of the piece as well as the thread. I also wanted to find other uses for the Memory Thread by DMC beyond just creating coral.

The thing that prompted this idea was a TAST project of Sharon B's, which she calls "cloud filling." (this is from week 10, Tuesday May 4, on PINTANGLE) Anne Stradal has also used this Cloud Filling on her blog - but she sees it as flowers growing on a trellis - a charming effect!! (The Cape Stitcher)

The ornament is from my e-pattern collection of Traditional Ornaments, and I'll build it a little bit at a time, as my preconceived ideas usually fall flat and require some ripping out and re-arranging. I'm using here the red Holographic 1/16" ribbon, and outlined it first, as always, to make sure the edges are neat and not jagged.

I wasn't happy with the first thread I used for background, as it was too white - but in retrospect, what I should have used was the DMC white #3865, which isn't "white white." This would have been combined with blending filament 032. What I've used here is YLI ribbon floss.

To begin the "cloud filling," I first made a tracing of the area, and penciled in where I needed to put the little loops of metallic ribbon. This allowed me to place the loops by referring to the drawing.

I like the ribbon here rather than braid, as it lies flat and really adds a dimension via the holographic glow. The loops must be made LOOSE, so the Memory Thread will go beneath it easily. I find using a size 18 tapestry needle to hold them off the surface while making the next stitch is a good idea - keeps them from being pulled tightly. Each loop is two stitches.


When all of the loops are in place, one may then start "weaving" in the Memory Thread. (I have a tutorial posted for using Memory Thread on my Freebies, etc. blog.)


On this piece, I came up from the back, and then going from left to right, just wove the M.T. over and under, creating the beginning of the lattice effect. I used a #18 tapestry needle to lift the loops so it would be easy to poke the M.T. underneath. Then, at the right side, the M.T. goes back down from front to back of the ornament. (this is explained in detail in the tutorial). EASY!!

Incidentally - the needle showing here is just to hold the M.T. back out of the way - and for lifting the loops, etc. The M.T. is entirely manipulated with the fingers - not in a threaded needle, which would be rather impossible.

In this detail, the arrow at top left shows where the M.T. is brought from back to front - and top right shows where it goes back down. The arrow at the bottom right shows where the M.T. will be poked back down from front to back. I think you can see in this close-up the remarkable qualities of these two threads - lots of fun to play with.


The ornament will be worked a little bit at a time, but will work as a whole when I'm finished (hopefully) - and not as a several separate parts that don't coordinate. This is where individual creativity comes in - and I encourage everyone to try it!!

Thursday, May 13, 2010

The Millenium Ribbon: It's Looking like Plaid!

This is now beginning to be quite entertaining, as it's beginning to actually look like tartan. At this point I always want to stitch a little bit farther for a few more minutes to see what will happen next. As the weft threads travel horizontally across the vertical bands of stitcihing, it takes on a new life.

I've never had any desire to paint plaid onto canvas, as it's impossible to do a true one that way, unless it's a very simple thing with very very few colors (such as gingham checks) - everywhere two colors cross each other, a new color is created. I would say "theoretically," as a needlepoint plaid is on coarse fabric - the mono canvas.


In this example, it's 18 stitches to the inch, so where two colors cross, it shows little dots, which are easily discernible, but nevertheless interesting. A pattern that resembles a plaid can be painted - but not a true, woven one. I suppose it could be done, but what a lot of time and trouble!!!

If you look at this example, you can see where the green crosses the yellow, a "yellow green" would be formed. Where green crosses white, a lighter green shows. On a woven fabric plaid with warp and weft, the thread count is normally so high that it does register visually as another color.


This is the principle upon which the Impressionist painter Georges Seurat based his Pointillism paintings - as the eye automatically assimilates the areas of tiny dots of pure color into the color the artist intended. My goodness, that must have been slow. La Grande Jatte is enormous!! (his most famous work)

Now that this "Millenium Ribbon" tartan is taking shape, I'm wanting to work on it more, and start setting up yet another of the ribbons. I could make these narrower by decreasing the counts - as beginning with the tiniest elements - the lines. Those could be reduced to one thread only, but would not have nearly the impact they do as two lines. On this pattern, they would show up, as the white, yellow, and green are light and bright agains the blue. This is a consideration! Back to the drawing board for a while.

Monday, May 10, 2010

A Fantasy: The Water Droplet Finished!

I really didn't think I could create another one, but this one I enjoyed as much as the others! A lot more experience in handling the Memory Thread, and, as always, a creative experience in choosing the threads. It still takes a bit of nerve to begin "painting with my needle" on a bare, stitched background - in this case, sand and sea water on a coral reef.

After placing the "main elements" - the seaweed (DMC Satin Floss), the Coral, and the first urchin, it was time to proceed with filling in the usual delightful clutter on the sand.


First, of course, the blue star fish, as I'm still enchanted with this. Then, just a dumping out of random samples in my stash - and leftovers - to choose a few that are compatible with the emerging color scheme.

Again, I seem to do best on this with no pre-conceived "color scheme." Just adding one thing at a time does the job, and then it's easy to see what else is required. One must consider, of course, in these color choices, the texture of the threads. They should enhance and complement each other. Too much sparkle or too much shine wouldn't be pretty as a whole.

I did use another of Sharon B's threads on the blue star fish, (which was worked with a fly stitch plus two spokes in the normal ribbed spider web stitch) because it also had the little bit of iridescent sparkle, but wasn't fuzzy - a smoother fiber. Lest this sound confusing, I've always seen "raised" or "ribbed" spider web worked on an even number of spokes - normally 8. However, for a star fish, 5 were required. This "5" format, being an odd number, is what we use to make silk ribbon roses, just weaving the ribbon over and under going around the foundation spokes.


The last photo is a detail of the sandy bottom of the coral reef - it needed some green, so I started with another sea urchin, but this time with Sea Grass by Thread Gatherer, which is smooth and small in diameter, so I was able to make a tiny one.

I'm enchanted with the form this method of stitching "spider rib" takes - it looks rather like a snail shell, which isn't what I had imagined. Hmmmm. Maybe I'd better get ready by working another "blank" water droplet.


Saturday, May 08, 2010

DMC Memory Thread: Creating "Coral"

I had already stitched a "blank" when I ran out of steam and out of time when I was creating the Coral Reef series - which is the feature of my article in the new issue of Needlepoint Now. I just received my advance copy, and Elizabeth B. has a way of making my little projects look better on paper than "in person."


Anyway - that, combined with some new underwater pictures I found, motivated me to dig in the stash for this one, dump out threads, and get started on a new piece. The background is worked in Nobuko stitch with DMC floss - a blue in two shades that aren't too far apart in value, and done with "needle blending" (Anne Stradal taught me). You can see the divisions marked on the side on the canvas - they're about 11 threads each. The sand is worked in horizontal diagonal cashmere stitch.


I have put up a tutorial on the method of using the DMC Memory thread on Freebies, Etc., as it took me a while to work it out, myself - trial and error. (mostly error and frustration in the beginning, but being determined, I finally figured out what I was doing wrong - so now it's rather easy!)This coral was created as the result of a picture I saw that had really gorgeous, bright colors - and the yellow is was exactly the color of the Memory Thread in my stash - as well as the peach for accents. The "polyps" are French Knots made with a variegated pearl cotton by DMC.

I always place the main elements first - usually a coral, a spray of seaweed, and a "critter." Then I can work around these, adding one thing and one color at a time, as any pre-conceived plan with color choices never seems to work.

As for the creature in this one, I had the bright idea, after studying pictures of sea urchins, to do a different kind of woven "spider web." Instead of the "ribbed" version, where one goes back over one and forward under two, I decided after looking at this beautiful thread, to try making the thread stay on top of the ribs - going back over two and forward under one. Doing this is going counter clock-wise instead of the usual clock-wise motion.

The thread was in one of Sharon B.'s gorgeous hand dyed hanks, (Pintangle) and actually has some very fine, variegated color metallic spun through it - about the weight of blending filament. Normally I wouldn't use metallics on these, but this seemed to fit. The texture seems to be a wool/silk combo from the feel of it, and it has a ropy twist, which makes an interesting surface.

I'm anxious to try this one with something smoother and see what it looks like. I figure that someone else has probably also developed this stitch - and it probably has a long, elaborate name, but this is how these things come to be. More on this one as it progresses.


Friday, May 07, 2010

A Penguin Celebrates Independence!

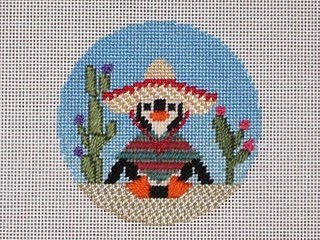
Anne Stradal has painted and stitched a penguin in honor of Cinco de Mayo, which we take very seriously in my part of town. (Austin) Independence of Mexico from France.

She has just finished this one, and as always, her simplicity in choices of stitches and the great combinations of thread textures, work together to create a charming ornament.

If you haven't already seen this one, be sure and visit The Cape Stitcher. Anne's penguins have more personality than any I've ever seen!

Pedro, now two days post "Cinco," looks like he's still tired but happy from exhausting celebrations.

Wednesday, May 05, 2010

Setting Up the Plaid (Millenium Ribbon)

In the very beginning of setting up a plaid on needlepoint canvas from an already existing one, the colors, of course, have to be counted and considered.

On a tartan with more than about three colors, it isn't quite as easy as it seems - it's common to miss one. The case here was that I didn't notice at first that there is a green stripe on the vertical set up, and a yellow on the horizontal. Irregular plaid!

This scan is very pale, so it's not easy to see - but it's just my doodling with the stripes to ascertain the widths of each relevant to the others. I do this on leftover scrap canvas with my drawing pen. The smallest elements - the ones that look like single lines - translate best when stitched as two threads on needlepoint canvas, so one must start there. Then, but just playing a bit, and comparing visual percentages of the widths, one can finally come up with a reasonable facsimile.
In the olden days (a few years ago) before I found colored Sharpie drawing pens, this set up would have been rather confusing to stitch. The colors, of course, aren't true - but they certainly help.

I drew the top and right side margins, (arrow on the left) and then changed my mind, as I wanted to include what was on the ribbon at top and bottom - the yellow and blue lines. The coloring in of the spaces gives me all the guidance I need for the stitching.

This piece came out to be 2 1/2" high. I would love to have had it narrower, as a ribbon, but I'm thinking of other uses for a band this wide. Anyway, it's a new format to play with , so at present it doesn't matter.
Beginning the stitching - as always, the warp is stitched FIRST in skipped basketweave, as that is the strength of the mono canvas, as well as the way the plaid is woven on a loom. I like to stitch about this far, and then do a bit across the weft to see the plaid begin to emerge.

I'm showing the section of the actual ribbon that you can see here with stitches on it so far. You might notice that the green has changed in this last photo. What I had already stitched didn't show up, as the green was too dark, and too close in value to the blue. I switched to one that I had discarded in the beginning as too bright - but it works fine here!!
It's at this point that I get really anxious to see how it will look with just a little bit more, or one more stripe worked - so it never gets boring. The only boring part might be in the beginning when setting up the initial verticals - but that doesn't last long! I'm already figuring out how to maybe make this narrower and do a set of Tartan napkin rings. Or put it on a small diamond shaped ornament with some glitzy stuff in it for a key ring. Lots of possibilities here!!

Saturday, May 01, 2010

Plaid/Tartan: A New Idea for a Project!

As I say often, some of my best ideas originate when looking at the beautiful blogs of the textile artists - art quilters especially.

Allison Aller was showing some crazy quilt blocks she's finished, and one had a "Millenium Ribbon" on it, which was a gift from a friend. As it is tartan, I had to ask for more information, and was told that her friend (link to this is on the blog) purchased it in Scotland in 1999.

Allie graciously sent me a close-up picture of it. I spent some time on the internet looking for "millenium" ribbons, but this is the only one I found - and it came from a store in Insch, Aberdeen. It's stated on that web page that it has been registered, as tartans must, to be "official."

Anyway, as always, I had to go cruising to find other tartan ribbons, as I didn't know they existed - and found buried treasure!! I found the Royal Stewart tartan in ribbon form, and also the "dress tartan," which substitutes a white background for the red - but is otherwise the same.

Incidentally, I discovered that the spelling for this tartan is STEWART, and not STUART, as I had always thought. The reason is that Mary Queen of Scots, who was raised in France, spelled her name as "Stuart," as there is no W in the French language.
When Queen Elizabeth adopted it as her official tartan, the English version of the name was used. Very interesting trivia. I'm showing the Buchanan tartan here just because I like it - and have always wanted to do something with it.
The Anderson tartan is my own, but it has seven colors, and is so complicated that I've never used it - it would be rug sized to include all the elements in needlepoint. I've already started playing around a bit on canvas with the Millenium tartan/plaid, and will do a few others as well. I'll show from beginning to end how to do this.
I've already discovered that in order to get in all the elements in their proper proportions, the ribbon will be 2 1/2" wide - so to my surprise, that's perfect for a picture frame or for a pillow to frame a monogram or initial!! I'm using the term "tartan" here because that is correct - although in this country only we use the word "plaid." This is explained in a previous post I did after some research into terminology. Just do a "search" at the top right (type in "plaid.")
Stay tuned for a How-To as it goes along. I never would have figured out doing these strips on my own, as the individual setts make it confusing.


Thursday, April 29, 2010

Wildflowers? ANG San Antonio 2011

I feel I've come full circle now, as a few weeks ago, after my article in NN appeared with the Talavera crosses, the manager of the Yarn Barn of San Antonio called me and asked if they might buy one of the crosses for a customer who asked for it. I told her of course, and then she asked if I could do the entire line of them in time for the Fiesta celebration (honoring San Jacinto and the defeat of Santa Anna).
The Yarn Barn has been under new ownership for the last two years, after a wonderful 35+ years with my friend Bobbi Ravicz running the show. I was amused, and told this lady that Bobbi and I started out this way.
When my newspaper article on the Imari needlepoint adaptation appeared for the first time in the San Antonio Express, a lady went to Bobbi, who was selling Persian yarn to weavers out of her garage - and asked if she could get one of the canvases for her - and to make a long story short, The Yarn Barn of San Antonio came to be.
Next, the present owner, right before they left for the Dallas market, contacted me and asked if I would do an exclusive for them for the ANG seminar next year, as The Yarn Barn will host it. I'm not too fond of this idea, as I no longer like to paint a lot, and I wasn't crazy about her idea for a design. However, I remembered this angel from the collection I did for the Governor's Mansion tree about 9 years ago, and thought it might be a good one for the visitors to San Antonio.
I would, of course, re-do it for a small ornament, and leave the wildflowers where they are. My favorites are showing here - the bluebonnets (which are gorgeous this year due to plenty of rain and no high heat yet), the Gaillardia, Coreopsis, Evening Primrose, and Huisache Daisy. Another consideration is that a model would have to be stitched, and it's really not what I enjoy most - this kind of design. (I have a very talented friend, designer, and co-conspirator who has now offered to do it).
This brings up another subject - stitch guides. I am seeing so many people now doing it as a business, but I do wish people would use their own taste and imagination and have enough confidence in their own originality to stitch to suit themselves and stop being so reliant on the mass produced/carbon copy commercial product. Some who produce the stitch guides actually know very little about stitching and are rather prone to overdo it.
Too many times the guides are not really up to standard, with entirely too many threads used, and too many complicated textured stitches within a very small space. This makes an eye shattering mess instead of a pleasing finished product - and the expense of such a great number of threads is not good. Simplilcity works!!
There is also the thing that some who are fairly new to needlepoint will be totally put off by the difficulty and miss out on a wonderful and relaxing hobby.

Monday, April 26, 2010

A Fish with Rubies and Scallop with Pearls

These two are all finished now, so I'm eager to start on the next ones - which will be stitched with different threads for different reasons.

Threads shouldn't be chosen just because they are the right color - but should have a purpose in the character and look of the piece.
Also to consider is the way they look against each other in combination, as they should be enhancing in the overall scheme, but not distracting.
In the case of stitching models to show with painted canvases (I stitch my own), there should not be overkill on the number of threads used on one little ornament, as that not only looks messy; but it would run the cost of the project up to astronomical, and probably cause the design not to sell well on the retail level. As a wholesale designer (and retail on the web page), I must consider this carefully.
I could have used something else red on the fish for the fins, but decided to use the Flair I used for the jewels - it looks different anyway in basketweave, and there was no purpose in adding yet one more skein of thread to the cost of the ornament, just for a few little patches of color.
There are also several places where I could have used different metallics, but, again, this would not only be distracting, but would greatly add to the cost of the piece. Must be practical as well as pretty!!
Next will be some salt water fish with the Holographic threads by Kreinik - I have played with those quite a bit now to see how and WHY to use them for what wonderful effect they might produce. Fun!!

Friday, April 23, 2010

Design Inspiration - More from the Past

I don't have a picture of the finished canvas for this one, but burst out laughing when I found it in the ancient file folder in the Jurassic layer in my filing cabinet.

Needlepoint is a great way to create a gift for someone we care about - (a great excuse for stitching), and something personal makes it even better. Much more caring is demonstrated than in just doing another carbon copy of what many others have done.

I remember while working on this, smiling to think how pleased and touched she would be. It was for the owner of a LNS now closed for several years - lots of fun we had there! Anyway, I found this picture in some kind of catalog, and immediately an idea came - as she was usually stating that she needed all the help she could get with both running the shop and her personal life. It just suited her personality.
This is the sort of thing you can do also, as now there are computers and copy machines and all kinds of devices to re-size and manipulate drawings. With this one, I re-arranged the lettering, (changed it also) and resized and redrew the little figure. It's a rough sketch that I smoothed out and traced onto the canvas when the whole thing was ready.
I dressed her in a typical dress she wore - it was dusty rose with a white knit shirt, and she wore a headband - I even reproduced the hair-do. Yes, ladies - if anyone from Austin sees it, it's Johnie Swenson about 12 years ago. A Good Point! in Tarrytown. It's just a little figure, but easily recognizable to those who know her. She loved frogs - so there had to be a frog along with it. I think I found this one on a greeting card - traced it, and reduced it waaaay down in size.
These pictures are all out of proportion to the way they were used on the finished canvas - but you get the idea! The whole thing was about 8" x 10" - she stitched it and had it made into a hanging plaque for the wall.
Hopefully this will give you some ideas you might start watching for in planning gifts to stitch. Something unique and personal is always well recieved!

Wednesday, April 21, 2010

More Color on the Nauticals!

At this point, the fish and the scallop shell are such fantasy, it's hard to remember that they started out as tracings from pictures of the actual things. As I said, the idea came to me several years ago when I realized that some antique jewelry pieces I saw in a magazine were in the shape of the real-life creatures, but embellished with glittering jewels.
This shell, for some reason, required these soft, pastel colors. I had something entirely different in my head when I first started - but like the softness of this. Originally, I intended to use "coral" or "peridots" on the peach band - but they were too bright and distracting.
Having two such differently colored canvases to work on is pleasant - when I get tired of the gaudy, glittering fish, I can switch to the scallop shell. The tail is worked with Petite Frosty Rays in a slanted stitch of 3 x 3 threads. I used the Frosty Rays effect instead of Flair, as I wanted the puffiness, and also the little bit of glitter of the inner filament. Hopefully it gives the effect of baguette garnets.
More tomorrow - or maybe something else more interesting. One never knows!! I should be painting, but would rather do this as creative avoidance for a little longer.

Tuesday, April 20, 2010

Coloring the Scallop Shell/Jeweling the Fish

As I state every time I start a new piece, it never adheres to the original plan. I'm liking the way the shell looks at this point, but the "pearls" will be in a different place, and the color I was going to use for a secondary "jewel" has changed. An interesting process!!

Anyway, this is how it looks now. I've used soft, muted colors in Petite Very Velvet to better show up the pearls and other jewels I intend to place. (the colored ones across the peach band).

Also, another possibility for threads would be to use perle cotton for the stronger stripes on the shell, for the "pebbly" texture, and Satin Floss for the less dominant ones - for the shine against the perle cotton. There are lots and lots of combinations of threads that could be used - as well as colors.

The fish is really coming to life and fun to work on with the addition of the colors. I used the same Flair on the dorsal fin that was used to make the "jewels" - but in basketweave, as it represents the enamel on the original piece of jewelry. Again, Petite Very Velvet is the background thread, as it shows almost no stitch texture, but only a soft, solid background that shows up the shiny stuff best.

Incidentally, this fish is a salt water Angel fish, which illustrates what one can do with tracings of actual fish! The band on the face is stitched with DMC Satin Floss in dark navy that looks black. I don't like using black on needlepoint unless it's something necessary, like Zebra stripes, as it's too harsh looking. Even on my Talavera designs, the outlining is done in dark navy - not black as on the ceramics. The blue "sapphire" eye is made with Renaissance Shimmer.

Now it's time to go prop my feet up and stitch for a while. Maybe the tail next, for which I've chosen a burgundy Petite Frosty Rays (Rainbow Gallery), as that's what was on the original brooch that inspired this design. I believe they were baguette garnets.

Sunday, April 18, 2010

The Fleur-de-Lys (or my distant past)

I was looking in old files this morning, searching for something - can't remember what at this point, but obviously didn't find it. Oh well. What I did find were some amazing things I had totally forgotten about - mostly done before I even had a color copier for reproduction. These finds are exceeded only by the charted martini glass I used to paint for people, which I found a few months ago in the "Religious" file folder. Figure that one.

Anyway, the first thing that fell out of a file unexpectedly, was this little canvas with two Fleurs-de-lys, which I had drawn in preparation for putting onto a tiny vest for a Beanie Baby about 12 years ago for an auction by the alum group of my college Greek letter affiliation.

Our flower was the blue iris, so the conventionalized form was also used - which is the "fleur-de-lys." (also stands for the "lily of France") I could not find anywhere the photo of the little vest, but as I remember, I also made a silk ribbon iris on one side in blue. I needed this symbol to be 1/2" high or less, and then stitched it with beads. I drew this again today, and colored it with a drawing pen that was lying on the table to illustrate where I would put the little cross band (in gold on mine)

One thing leads to another, and I was reminded of one of the angels I designed for the Christmas tree at the Governor's Mansion here in Austin back when Mrs. Perry (Anita) asked for a collection of angels of the 40 sq." size.

The next one was in remembrance of a past Governor's wife, Mrs. Price Daniel, who was also a member of my sorority, as was her daughter, who was active in the chapter when I was. The irises on this angel are not "blue," but are in the colors I love so from the Leah Schwartz paintings.

I remember we used to giggle about that Fleur-de-Lys, as it is on the coat-of-arms for the Royal Stuarts, as Mary, Queen of Scots was essentially French - (her father was a Stuart king of Scotland, but she went to France as a child to marry the Dauphin (who died very young) and become Queen of France.)

The Fleur de Lys was symbol of the French ruling house, and Mary's son became James I of England after Queen Elizabeth I died with no heir. Thus the Stuart tartan became the Royal Stuart tartan, and Queen Elizabeth II has adopted it for her own personal tartan - her honor guard wears the kilts in this pattern. Prince Charles, when at Balmoral, wears the hunting coloration of this same tartan, which is in darker, cool colors ( blues and greens) Obviously, this is my favorite period of English history, besides the Plantagenets.

Next find was a drawing - the color picture has vanished. I remember really enjoying drawing and painting this one. The note to myself on the tracing paper says it's for a 4" x 6" photo. The spider web in the center is just a better tracing to use when putting it onto canvas, as the one in the corner was rough and not good to use for the final piece.

I drew this a number of years ago - but was told by a few shop owners I showed it to that people would not be interested in stitching Halloween stuff. Oh my. Those little dots, I believe, were silver, representing stars. Now, with more wonderful novelty threads, this would almost tempt me.

My original inspiration was the reallly great photos we took of my first two little grand daughters at Halloween. I thought it would be fun to have those displayed year 'round, but they needed more than just a plain frame. I never did get around to stitching it- and have no idea where it is.

Looking at it, I see DMC Memory thread on the pumpkin vine tendrils, and plenty of P.V.V. on the pumpkins. I had to buy a book on carving Halloween pumpkins to get the facial expressions. Fun!! More on the finds maybe tomorrow - this is too long as it is. I may have to give myself another day off and go dig in the bottom drawer of the file again. I might even remember what I was originally looking for.

Friday, April 16, 2010

Choosing Threads for the Fish

It's amazing how a canvas design will come to life when the stitching begins! Even if I had painted the canvas first, the threads would liven it a lot.

Threads are just so much prettier than bare painted canvas, as the textures are what make the piece, as well as the colors. I think this is the main reason I'm not fond of the "light coverage" thing - I feel like "why bother to stitch it at all?"

However, in the opposite direction, I see entirely too many different threads, sometimes, used on one small piece, for no apparent reason. There should be a purpose for each thread chosen, so that the stitched design works as a whole and not just as a collection of different textures, which can become an eye shattering mess.

Petite Very Velvet may seem a strange fiber to use on a creature which lives in the water - but in this case, I wanted a coloful background for the sparkling, shiny, and gleaming accents on the fish. Then there is the fact that, worked in basketweave, the PVV has almost no texture or light refraction, so just looks like a smooth, soft area.

My first thought had been to use the DMC Satin Floss for it's shine - but realized that it would be so shiny and have so much "light break-up" on the surface, that it would detract from the "jewels" and other design features. I will use the Satin Floss in another place - but more logical than the background "skin" of the fish.

The jewels are worked in a "bump stitch" I enjoy using, and with Rainbow Gallery Flair, as I didn't want a lot of sparkle here either to compete with the metallic braid of the chain. The Flair has just enough sheen to look right.

Usually, I go about choosing the threads for a canvas with something in mind first, but then upon dumping out the various categories of stash threads, I will spot something better than what I had originally intended. More on this later, as I move along with the fish and begin on a shell.

Tuesday, April 13, 2010

Scallop Shell and A Fish in Needlepoint

My photography is never the best, but is really off tonight, as I didn't notice the light zapping the gold tag until I edited the picture. Oh well. I started the fish today, as I couldn't keep my hands away from him another day.

This fish is from a collection I did a number of years ago (time flies), when I was inspired by some jewelry in an antiques magazine. I didn't realize until later that the fish in this lot were the shapes of actual tropical fish! The painted version is on the other blog (Freebies, Etc.), where the patterns are available for print out.

I've assembled Petite Very Velvet for this one, as I'm very fond of the effect of the metallic thread and shiny stuff against it, and the greens are right, I think. Also in the plan is some DMC Satin Floss - the black band on the head and another place or two.

I'm using the Kreinik #12 braid in 002V, and 1/16" ribbon for the little silver "beads" in the chains of jewelry. I chose the ribbon mainly because of the way the light strikes the surface on the Smyrna cross I used here. Braid would have worked fine - but not as effective as the flat shine of the ribbon.

These metallic threads are so wonderful for accents and special effects - things we didn't have when I first started designing almost 40 years ago.

The jewels are probably going to be red, as on the painted version, but I wanted to also show what I usually use for "pearls." This is Shimmer by Renaissance - great pearls!. Sorry about the glare on the tag.

I have several things drawn on canvas and ready to stitch, and will be doing them, I hope, simultaneously.

This scallop shell is very small - you can see the scale by comparing it with the cards of PVV. It's only 3 1/4" high on 18 mesh canvas - and this one also is available on Freebies for you to use to create your own.

The original was blue and green, but I like the look of this color combo, and of course the "pearls" in Shimmer will be lovely. What looks like coral on the blue and green version (Freebies) will probably be changed to peridots on this one.

I'm off to stitch some more and find a NetFlix movie to watch meanwhile. I've given myself another day off from the marathon of painting Talavera crosses for The Yarn Barn of San Antonio for Fiesta - San Jacinto Day celebration. I found I couldn't keep up the pace as I could have 20 years ago. Oh dear.

Sunday, April 11, 2010

Kreinik Metallic Threads: The Many Faces!! (a tutorial)

While going through my rather enormous stash of Kreinik metallics this morning - looking for something I can't find, of course - I was once again amazed at the variety of sizes, colors, finishes, and uses of this miraculous and wonderful thread. As I've said before, I refused to do anything "'Christmas" for many years, due to the fact that there was nothing to stitch with that would make them sparkle and glitter.

These days, almost everything I do has some kind of Kreinik metallic on it, as it is so very very versatile for embellishments and special effects.

However, watching blog stitchers from time to time, and talking to local stitchers, there seems to be confusion about what weight braid to use on which size canvas. Just the braid itself ranges in size from 4 to 32. (increases in increments of four ) Once again - COMMON SENSE!! If it doesn't fit the canvas properly, try another size. Normally, #16 braid fits 13 mesh canvas beautifully for tent stitches - but is skimpy for upright. #12 braid is for 18 mesh canvas in tent stitches and long, slanted stitches, but won't cover well for upright stitches - so one must simply use #16 braid. (Now that "ribbon" has been invented, I love it for the long, slanted stitches, and also for upright stitches, as it lies so flat on the canvas.)

Upright stitches are like bargello - and remember that we always increase the size of the thread for this, as we used 2 plies of Persian wool long ago on 14 mesh, but increased to all three plies for bargello and other upright stitches.

When I stitched the ornament, the ribbon was a new product, and it gave us a whole new dimension for stitching with metallics - I initially thought the 1/16" would work for 18, and the 1/8" for 13 - but actually, the 1/16" works quite well for both upright and tent stitches on 18 mesh canvas, which gives it a great versatility, as the same spool may be used within one piece instead of having to switch to the braid in same color. It's quite flexible in texture.

Here, the gold is ribbon, but I didn't have it yet in the teal, so used braid - #16, of course - and you can see how much flatter the ribbon lies - Also on the leaves around the center flower. The ribbon also eliminates a lot of the "dandruff" that is a problem (canvas showing through) with upright stitches.

The leaves on the Henry mini-sock were also stitched with #16 braid - pre ribbon - and you can see that they don't lie smoothly. However, at that time, there was no metallic ribbon, so I didn't know the difference!
The diagonal piece was designed and stitched after I started using ribbon, and the leaves - although the braid would have worked on the slanted stitches, are beautiful and flat with the metallic ribbon. This is my favorite green - #015 Chartreuse. Notice also how nice and flat the little mosaic stitches are as leaves for the red flowers - the mosaic stitches are outlined in tent stitches with a darker green #12 braid.

The gold, which works so beautifully with Petite Very Velvet and beads, is the 002V. I used #12 braid for this, as the Smyrna crosses and the tent stitches around the bead strand didn't really require ribbon - nor did the long armed cross stitch border. However, ribbon would have worked if that had been all at hand! More on this later.

The Kreink metallics aren't just about braid - they begin with blending filament and go through many many sizes of braid and ribbon, and also "cord," cable, and Japan thread, which have different looks and uses.

Stay tuned - we also have the new one - the "Holographics," which should be great fun.


ADDENDUM: I swore today that after a long week painting, and another yet to come, I would rest a bit and not think about work or new projects - but couldn't leave this one alone, as it's too fine not to think about! Sooo I got out the box and took pictures and played a bit.

The first photo is the new Kreinik Holographic blending filament - some wild and fun looking stuff!The second one is a few of the colors, illustrating the variety of "finishes" and looks just within one grouping of metallic threads - rather incredible. The arrows are pointing to the braid, and the really shiny stuff is the BF, and the other is 1/16" ribbon.

Normally I only use the #8 braid for surface embellishment, as it's too fine for tent stitching and outlining on 18 mesh canvas. However, I've had some "special effects" and embellishments in the back of my mind for quite some time, and this is what I need to accomplish it. Now I'll have to paint really fast this week and reward myself with some play time. Oh joy!!

Sunday, April 04, 2010

Calla Lilies in Talavera for Needlepoint

I have just now finished painting this, as it's destined for San Antonio for Fiesta later this month (The Yarn Barn), and realized it's an appropriate picture for a post today!!

As my family is off somewhere munching on Cadbury Creme eggs, jelly beans, etc.,(after doing Church things, of course), I'm painting crosses for the celebration commemorating Texas Independance with the victory at San Jacinto.

Anyway, the calla lily, although a native of South Africa - and the Isand of Madagascar, has been a beloved and symbolic flower of many cultures for many centuries, starting with the ancient Greeks. It's considered to represent "magnificent beauty," purity and chastity, so is appropriate for use at many festive occassions..

In Mexico, it has been grown and loved for several centuries - and was a favorite subject for the painter Diego Rivera. Lately I've seen it on many different ceramic objects in Talavera, so have enjoyed adapting this flower in this style to needlepoint!

Thursday, April 01, 2010

Silk Ribbon for April

According to my Kodak albums, I didn't finish this until June of last year, so didn't use it for the Freebies, Etc. header - or maybe Freebies didn't exist yet. I don't remember. (a common complaint these days.)

Anyway - I do remember procrastinating, and consulting several books on the subject, but couldn't find sweet peas - so, once again, consulted what was growing in the garden, I think - or pictures of someone's garden - and created my own.


Anyway - the flowers and jewel for April (diamonds) are represented here, and my older daughter loves the fact that her husband has an April birthday, so he may give her diamonds in his own honor. The instructions for this sweet pea are under "birthday crazy quilts" on the side bar.

This is also available at Elegant Whimsies as either a painted canvas, or as an e-pattern for creating your own.

While on the subject of silk ribbon - I also found this ancient picture, dating from when I was playing with ornament shapes to practice and learn new - and also very old stitches from my 70's books - on simple cookie cutter shapes.


The tree on the left shows swags of silk ribbon flowers with beads in the background. The tree on the right is a combination of stitches from a very old and out of print book that was one of the best of that era - I really enjoy playing with this one, as the color combinations are endless.


I believe these two trees were finished by Vikki Pinson, and are used in a display on small dowels on little wooden platform pedestals - very effective for a forest of trees on a mantel - might even vary the sizes and shapes!!


The tree ornament shapes are from my e-book "ornament shapes II." (Elegant Whimsies)